
Data Integration Implementation Methods with Flat Files

This post is around Oracle EPM Cloud Planning – Version 23.06.60
A few weeks ago, I have tried to ask my network on LinkedIn their preference about Flat File integration strategy. Despite a bit of sadness because of not much comments, I still had some answers to the poll: and that was already a warming news.
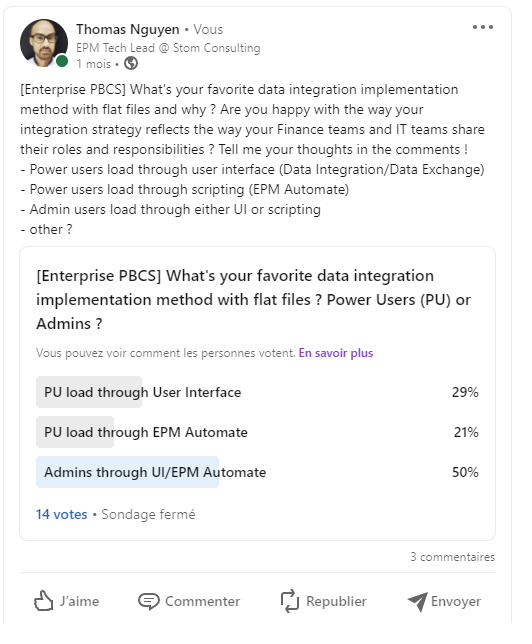
It’s interesting to see that most the respondents have a clear preference to implement a Data Integration meant to be used by admins. I would say this is mostly because part of our job is to take care about this kind of topics and unload the weight of our key users or end users. Especially during some critical phases of the projects we all face.
Having that said, let’s see how this can be done. This might be helpful for folks usually focused on other topics than data integration!
Let’s start!
Well, well, well! It seems like someone needs a crash course in Data Management and Data Integration. If you haven’t already jumped on this bandwagon, let me tell you, my friend, it’s the hottest thing since sliced bread! And guess what? Data Management is about to become as outdated as your grandpa’s vinyl collection. Brace yourself for the thrilling revolution that Oracle is unleashing upon us with their EPM Cloud. Check it out, I promise it’s a page-turner! [ Link to Oracle’s vision of the future ].
I’ll try to cover the Pipeline topic in a next post… stay tuned! But for now, let’s focus on the steps required to be able to load a flat file: – Register an Application – Define a CategoryMapping – Define a Period Mapping – Define an Import Format – Define a Location – Create a Data Load Rule
Registering an Application (1/6)
To understand why you would need to register an application, you have to know that in its history, from the most recent to the oldest (on-premise) it had different names: Data Integration, Data Management, FDMEE, FDM. Just to mention that it was considered then a different solution, understand external to a Planning application, so you had to declare to which target application to export the data from the ELT layer.
So you need to go to Data Exchange > Actions > Applications
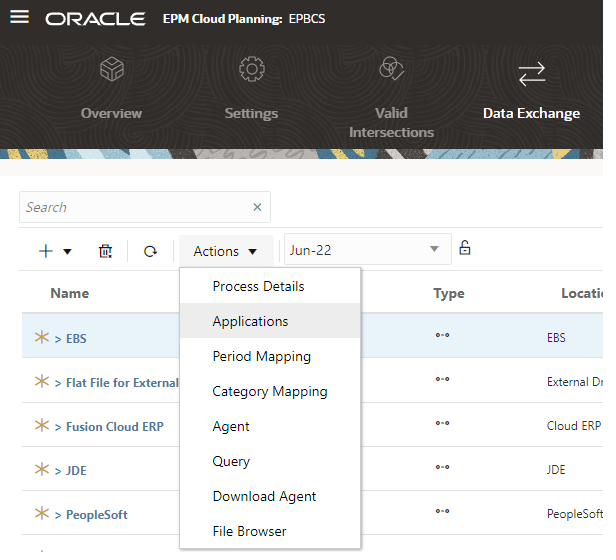
In my case the Planning application was already there, but you could add it here if needed.

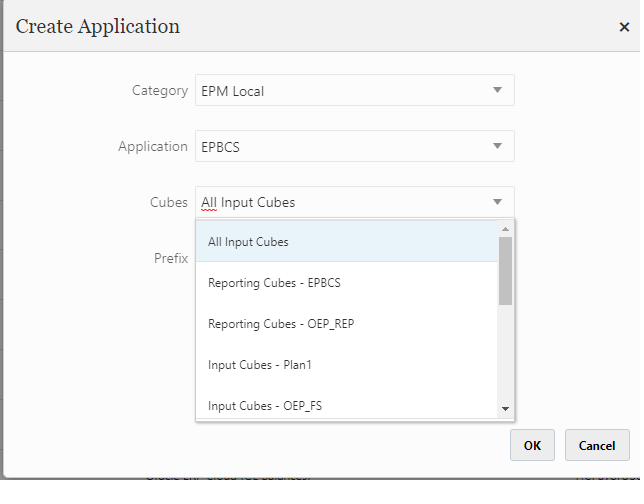
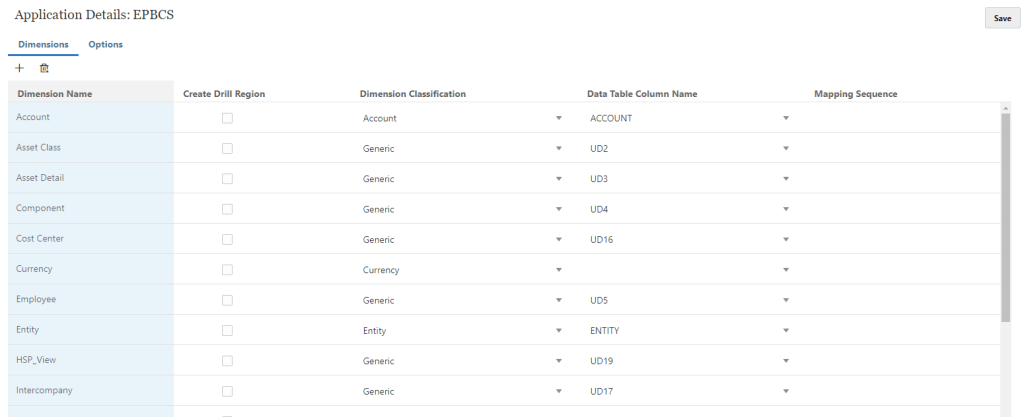
Create the application automatically generates some technical mappings within Data Integration, such as UD2, UD3, … This would refer to “User Defined” dimension, that’s all we need to understand here. You can click on Save.
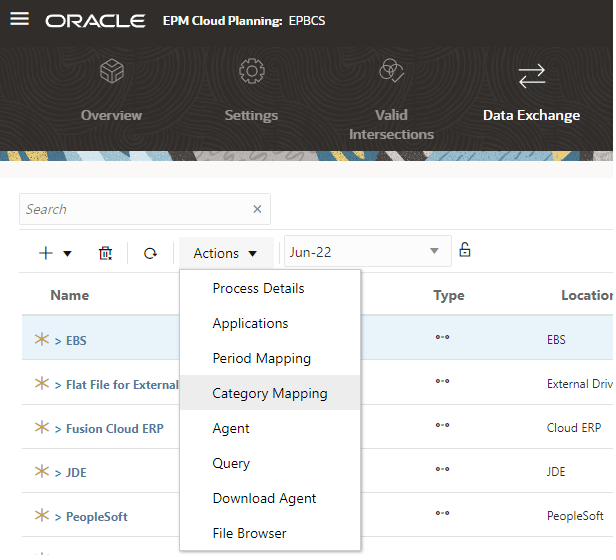
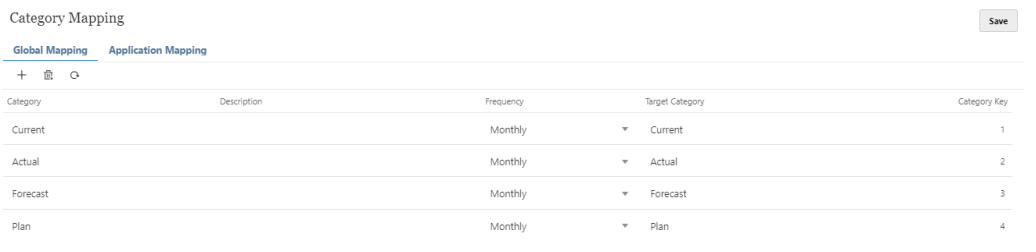
Define a Category Mapping (2/6)
The Target Category should match one of the members of the Scenario dimension. I’ll just ensure here that I have the Actual category created as show below.
Define a Period Mapping (3/6)
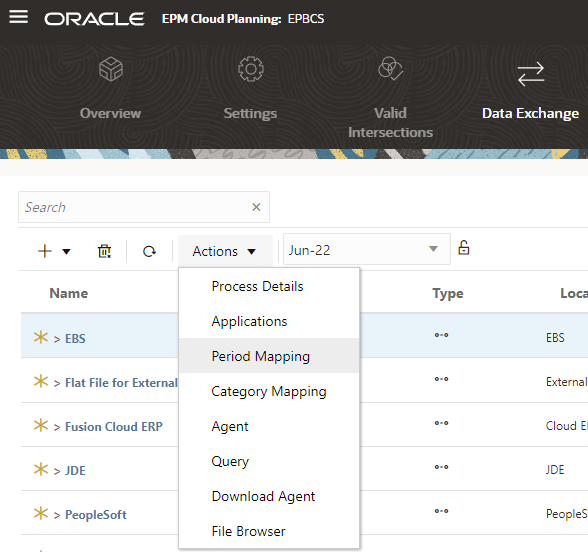
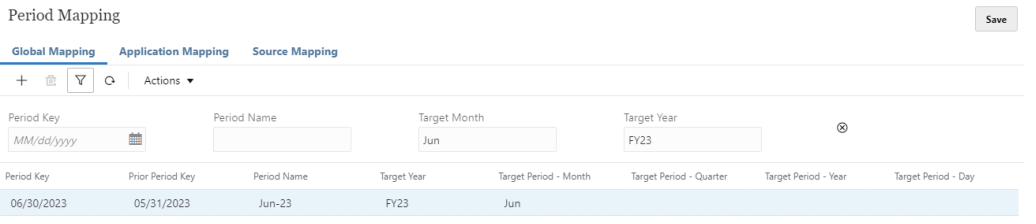
The Period Mapping should contain the Year and Period members you need to feed from the flat file. To keep things simple, I will only update the Global Mapping tab.
At this stage of the configuration, you would need to have some dummy (or real) flat file created. Header row as a first row is not mandatory, it’s just going to facilitate the mapping in the next step.

NB1: I have not found a way to configure steps 4 and 5 below other than in the old Data Management UI. In case I missed it I would appreciate you tell me where this can be done in Data Integration UI! It’s potentially just a matter of patience that Oracle Product Development team will provide it in Data Integration UI in the coming months though.
NB2: I haven’t found where to change the language in the Data Management UI, so if you have any tip I’ll appreciate 🙂 You will have some french words in the following screen shots in the meantime…
Define an Import Format (4/6)
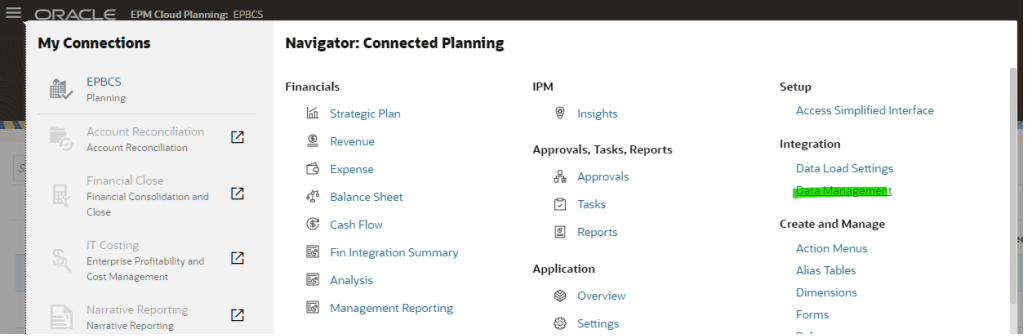
From the hamburger menu, under Integration section, select Data Management:
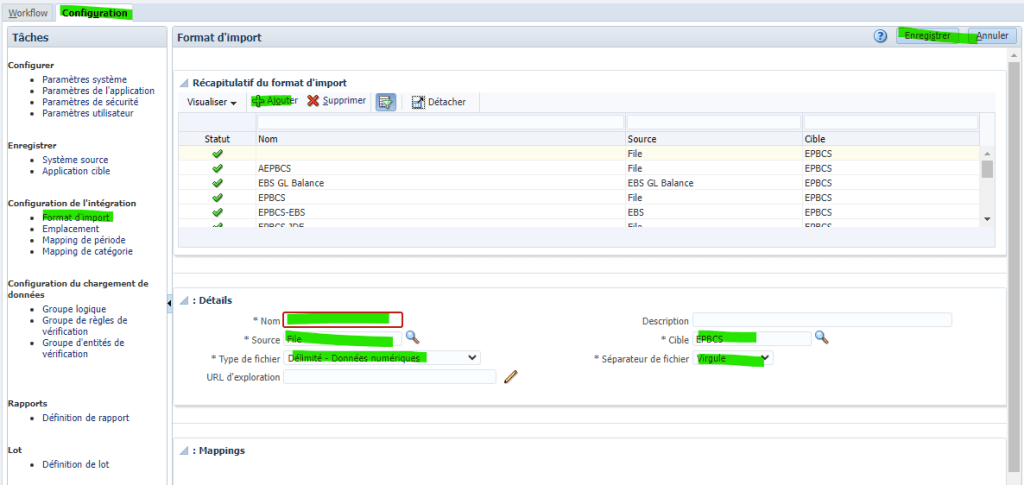
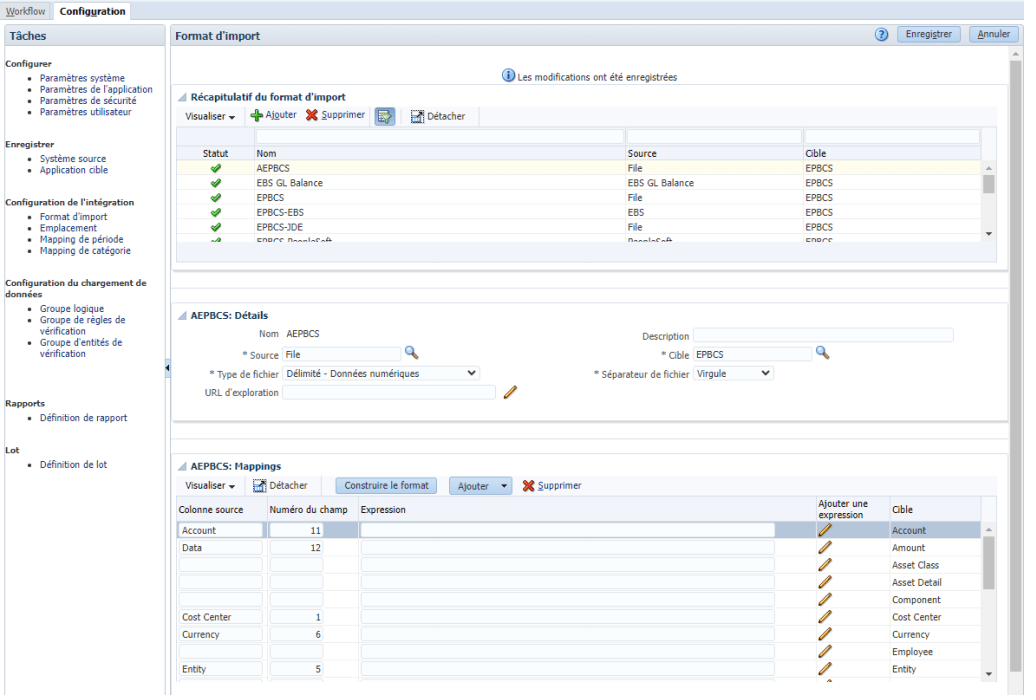
On the popup screen that has opened, select the Configuration tab, Import Format, Add, and fill in the 5 mandatory fields (name, source, file type, target = target application, file delimiter). Here, let’s stay simple and keep source = File, file type = delimited numeric data, file delimiter = comma. You can check full documentation link here. Don’t forget to hit the Save button!
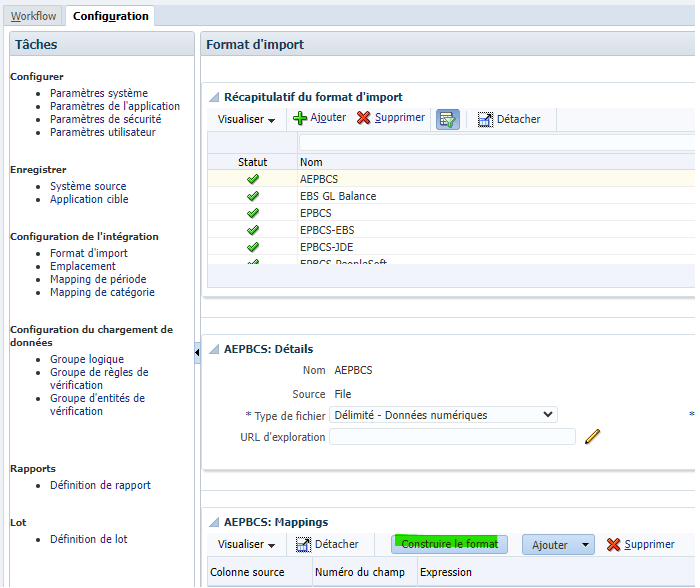
I gave it the AEPBCS name, so now I can build the Import format:
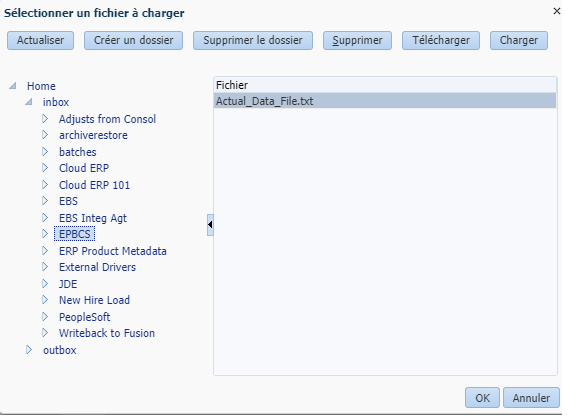
I can upload and select the flat file, and the use the import format generator by selecting each dimension header and to map it to the proper Planning application dimension:
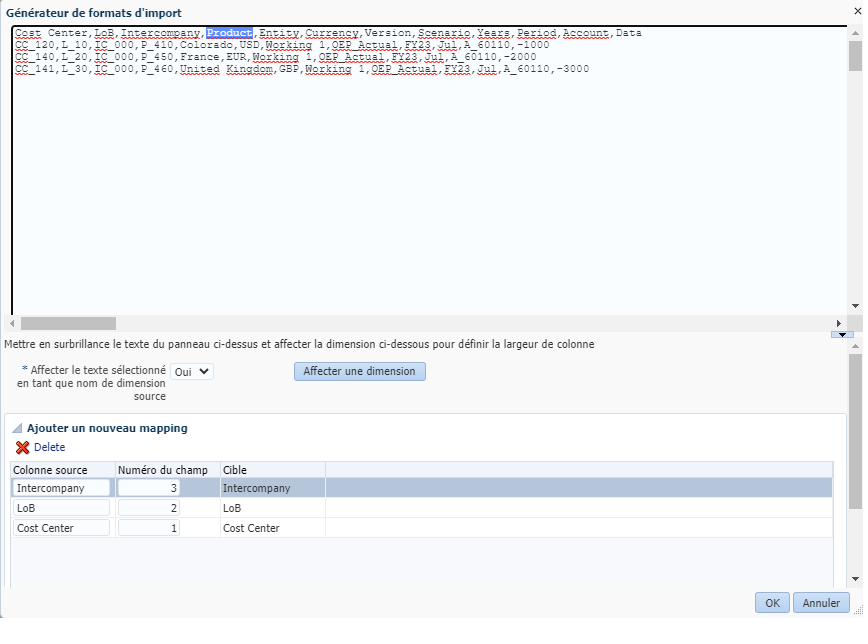
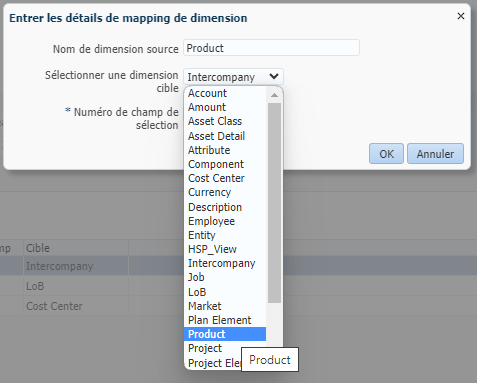
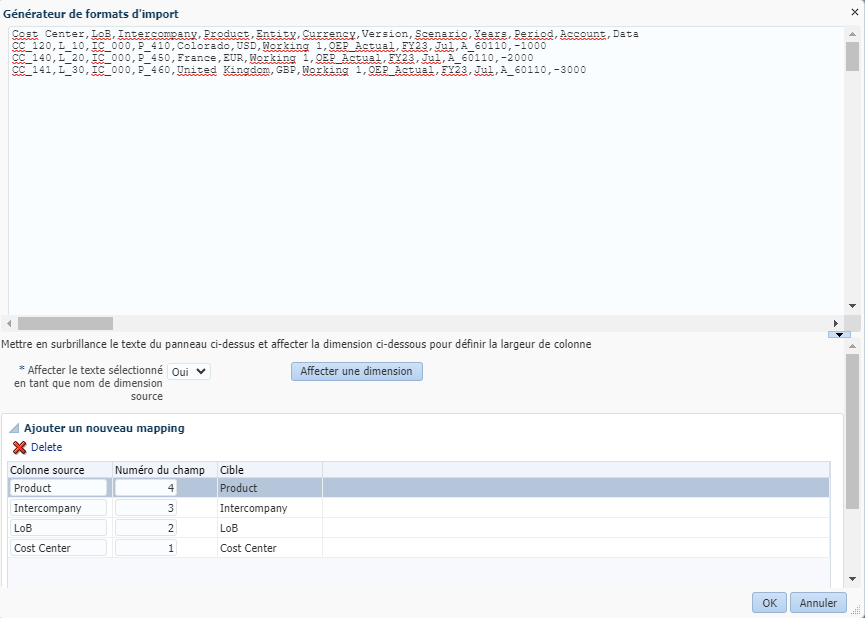
This can be more or less tedious, depending on how many dimensions you have to configure here. When done, you should have something like this, with the Source column and Field number filled with the proper text and values:
Define a Location (5/6)
Again in Data Management, you can add a new location by giving it a proper and meaningful name, and select the Import format created in the previous step 5.
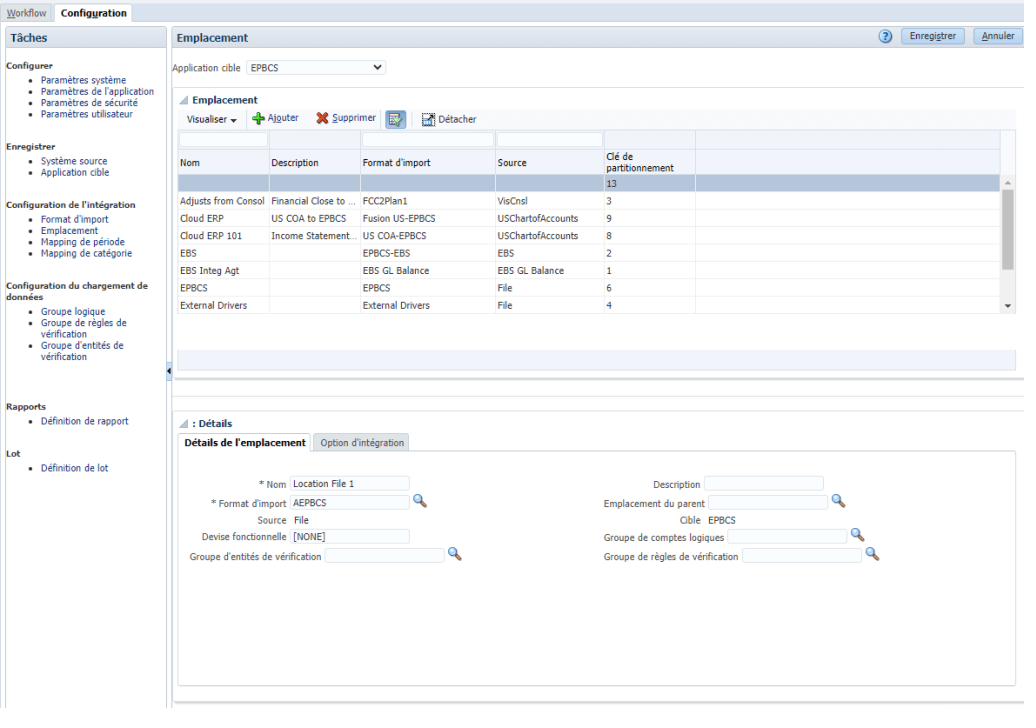
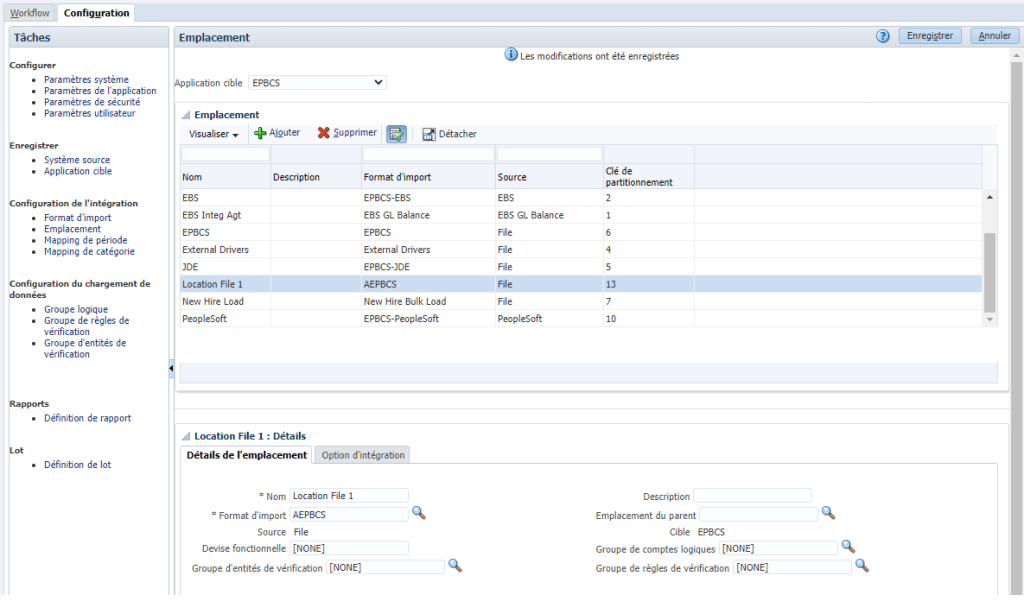
From here, you can close the Data Management UI and finalize the remaining steps in the Data Integration UI.
Create a Data Load Rule (6/6)
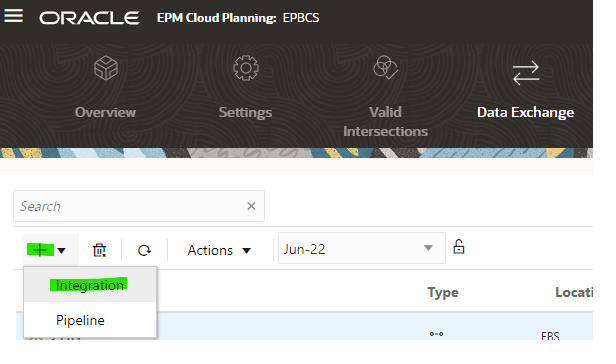
This is the last step: under Data Exchange, create a new Integration.
Give it a proper and meaningful name, and select the expected location, target cube, and category.
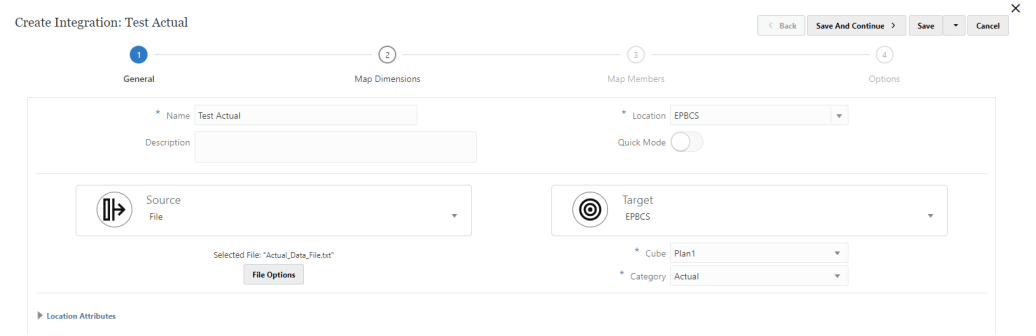
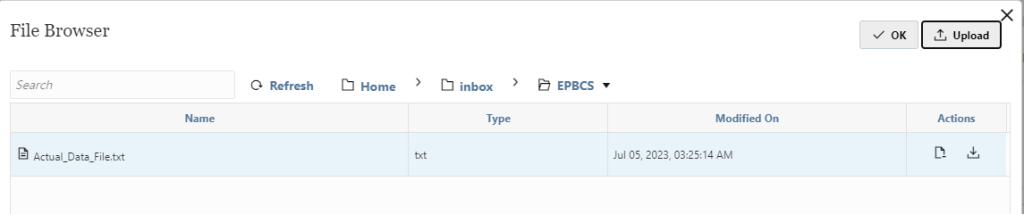
When selecting the location, you should have the File Browser window that should popup to allow you to select the flat file to be set by default within the Data Load Rule. Once selected, click Save and Continue.
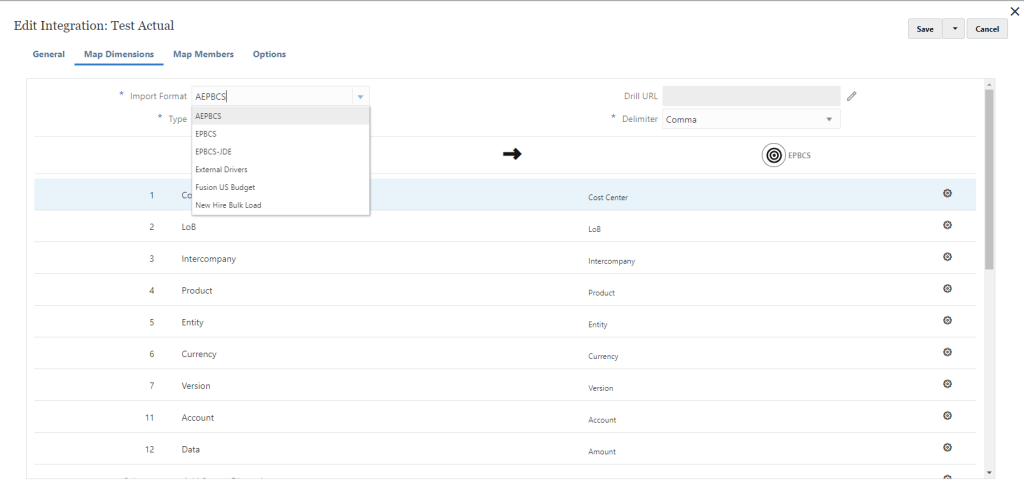
In the Map Dimensions tab, Select the Import format created previously, and click Save.
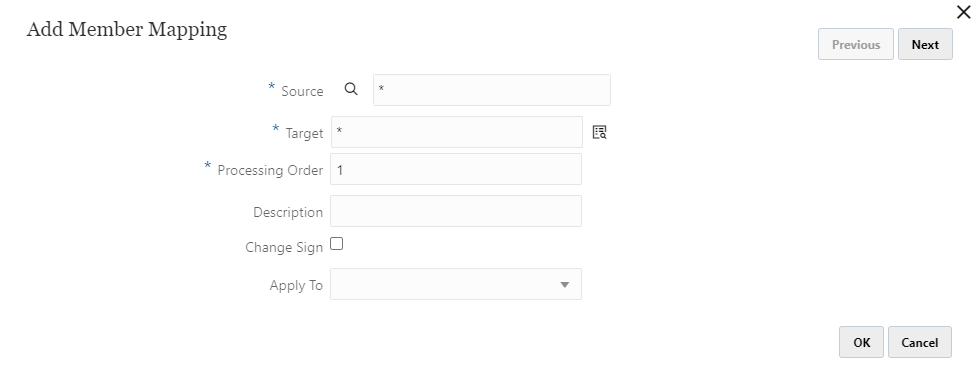
You will get to the Map Members tab, where you will need to add any required mapping on each dimension from your target cube. This is a crucial step so please double check that you are not missing any mapping in the dimensions of the cube you are trying to load data into!
In my simple data file example, all the members are exactly the same as in the dimensions, so I will have a * to * mapping:
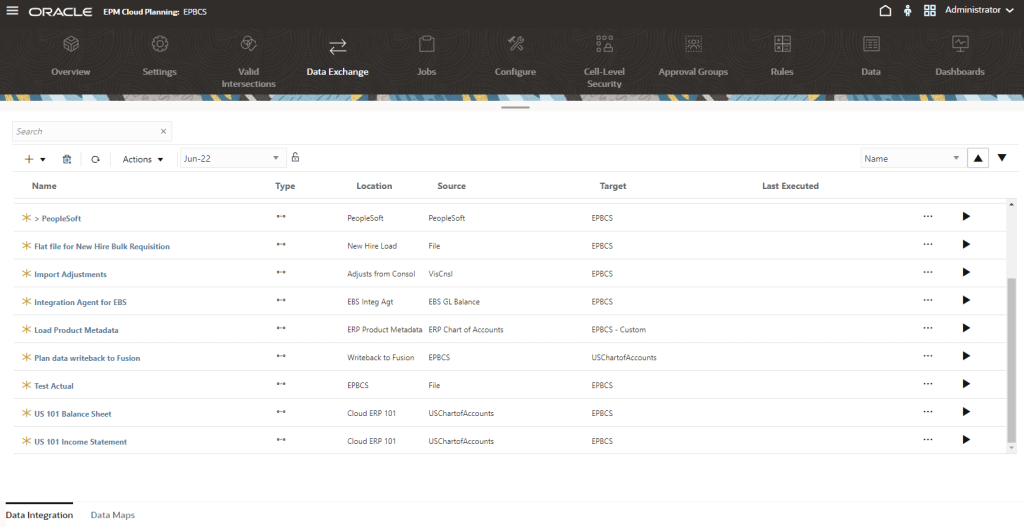
Here we go, we have completed all the steps to load a file 🙂
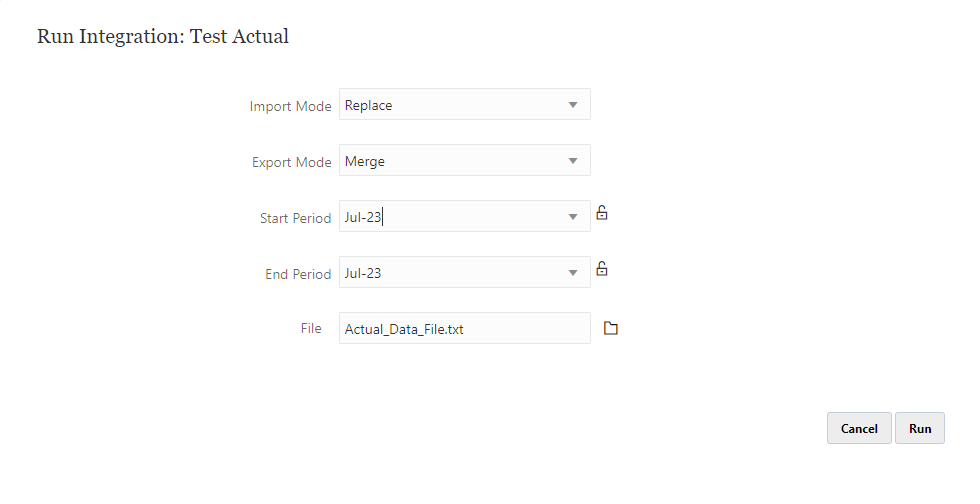
Simply click on the “Play” button of your Data Load Rule, and fill in the fields as required (Replace & Merge in my case):
For more explanations on possibilities, you’ll have the official documention for the Import mode and the Export mode.
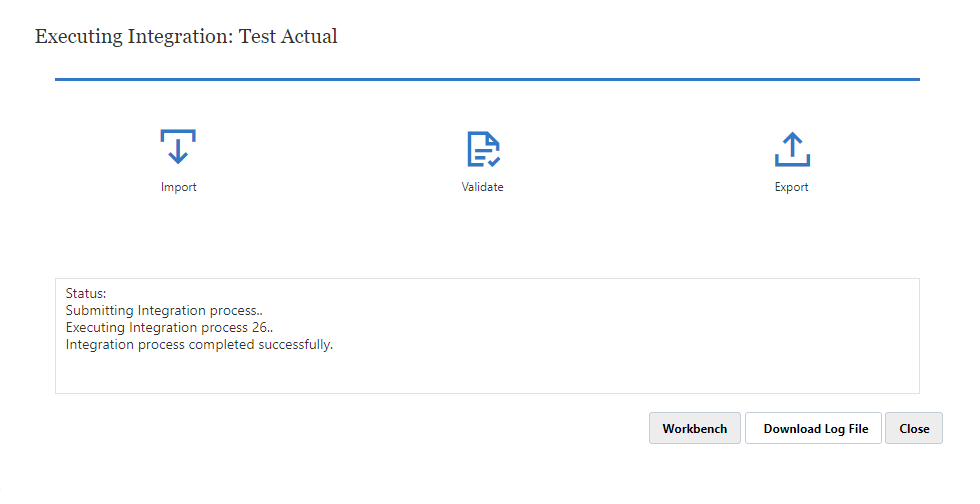
Once you click on Run, you can follow the integration of flat file with the following steps: – Import (to Data Integration) – Validate (within Data Integration) – Export (to Planning target cube)
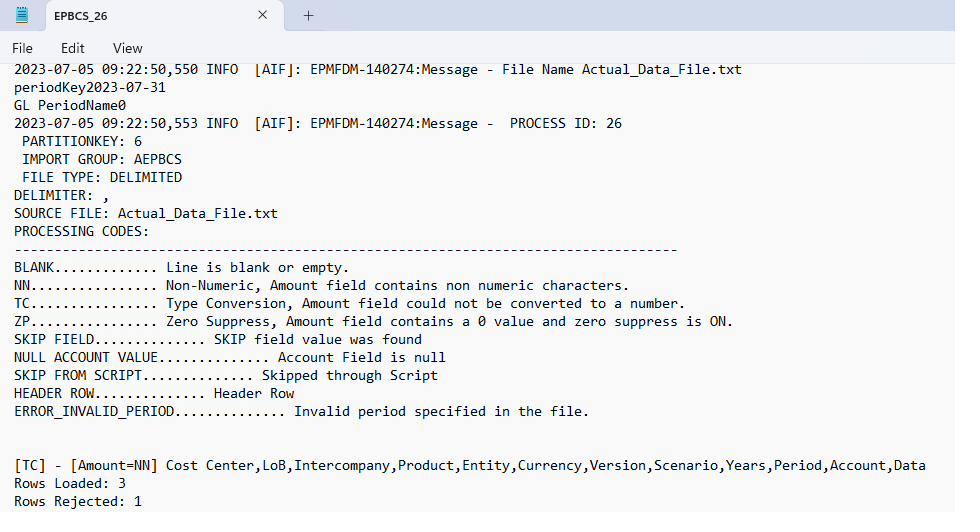
You can then download the log file and perform some Job log analysis, for example to tune some performance. Official guidelines are here for more details.
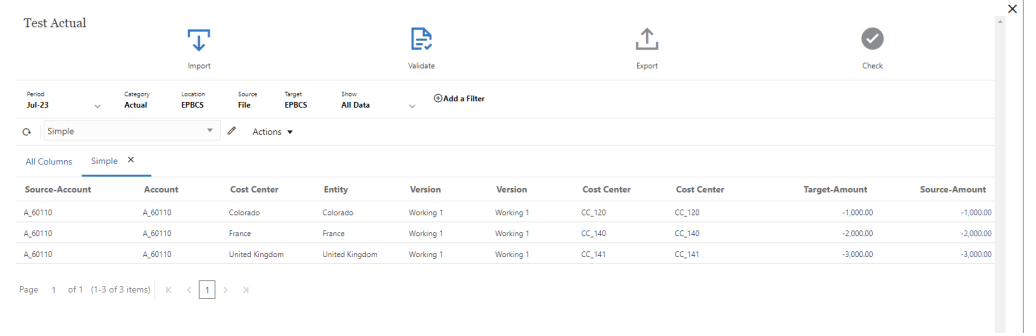
Last but not least, the Workbench allow you to query the internal tables of Data Integration to perform some detailed analysis to understand the members before/after mapping is applied, to create some views (column filtering), and so much other things …
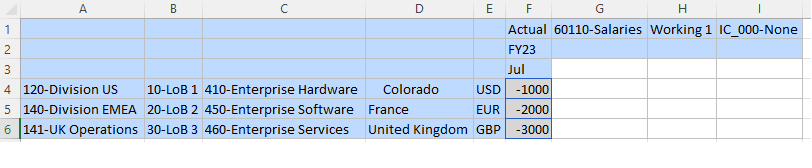
Utimately, what we are all looking for, here, is that the data is properly loaded into our target cube, which I think is fine:
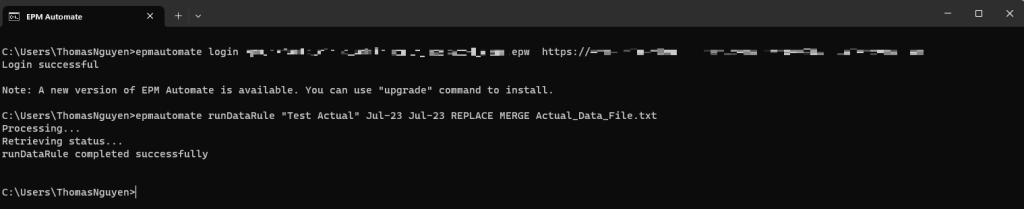
Calling the DLR through EPM Automate
Last but not least, you have the possibility to call the Data Load Rule directly from EPM Automate client.
This seed that may remind you or guide you through the basics of how to get a simple DLR set up within Data Integration. Eventually, it may help you grow your EPM dreams…